I have tinkered for years with the Raspberry Pi, having used them for teaching computing as well as in service projects. The Raspberry Pi provides a low cost, low power, flexible, nifty computer about the size of deck of cards. For these reasons, I was drawn to exploring its use also in ham radio applications.
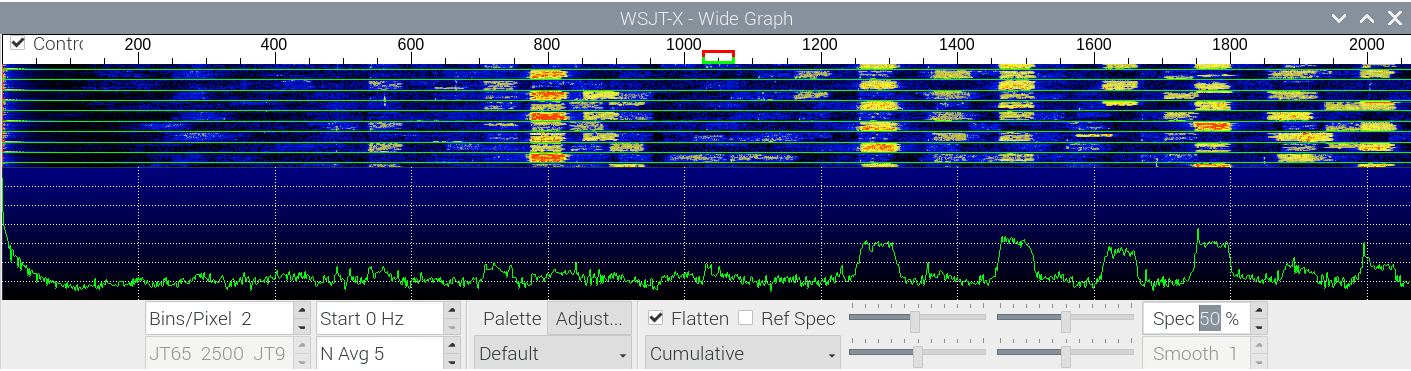
I have been experimenting with HF digital modes. Prior to my current rig, I had an Icom IC-718 and built an interface between the rig and a Raspberry Pi 3 Model B+. The audio and PTT lines are fed from a 13-pin DIN connector at the rear of the rig to the Raspberry Pi through an interface board. The interface uses a modified “easy-digi” board which was assembled using lead-free (RoHS) solder.
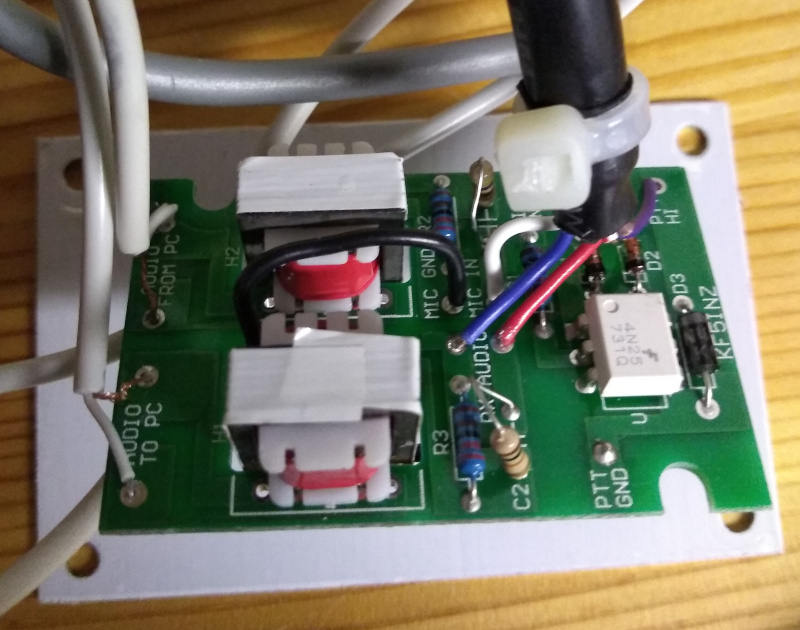
Since the Raspberry Pi is not equipped with a quality audio output or mic input, a modest USB audio interface was used. The speaker/mic lines are connected to the rig through small audio transformers for isolation. The audio lines pass through simple resistor dividers to scale the voltage input so it is suitable to the mic input of the rig as well as the mic input of the USB audio adapter. (Series capacitors were originally used, but replaced since they limited the low frequency response of the audio signals).
Some HF radios are equipped with a VOX (Voice Operated eXchange) setting which detects when you start speaking and automatically switches the radio to transmit mode. This can also switch the radio to transmit when a modulated signal is placed on mic input. Unfortunately, the IC-718 VOX does not work when feeding audio in through the modulation input, hence the need for a separate separate means to enable transmit. The PTT (push-to-talk) line on a radio is normally used to manually place the radio into transmit mode. The Raspberry Pi can control the PTT line by connecting a USB serial port interface and using the RTS/DTR line from the serial port as a control line. The RTS/DTR line is fed through an opto-coupler for isolation and then into the PTT input.
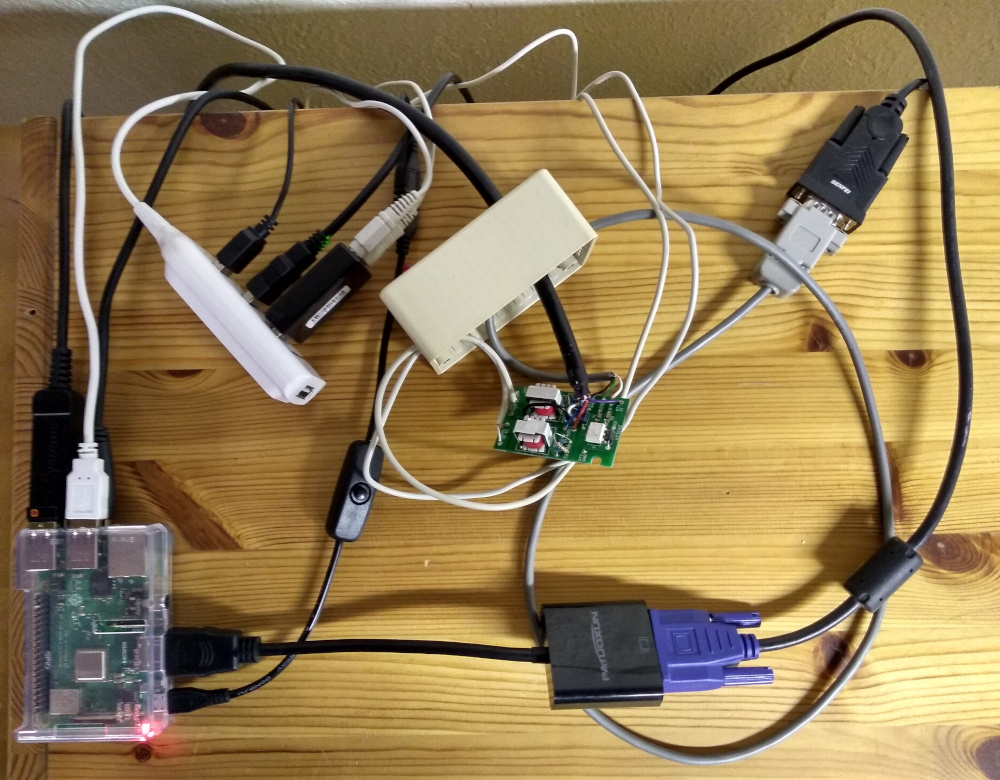
The CI-V interface on the IC-718 provides a way to control the frequency and mode of the radio from the Raspberry Pi. A CI-V cable can be obtained that plugs into the USB port on the Raspberry Pi and plugs into the CI-V port on the IC-718. An image of the Raspberry Pi setup along with all the interface electronics and wiring is shown below.
The Raspberry Pi is running Raspberry Pi OS. I have found that the ham software in the repositories is often out-of-date, and so I install the software directly. I make use of the following programs running on my Raspberry Pi: